This article provides a comprehensive guide on growing chia seeds at home, covering everything from soil requirements to harvesting techniques, ensuring you can cultivate this nutritious superfood successfully.
What Are Chia Seeds?
Chia seeds are tiny, nutrient-rich seeds derived from the Salvia hispanica plant. They are celebrated for their high content of omega-3 fatty acids, fiber, and essential nutrients, making them an excellent addition to any healthy diet.
Why Grow Chia Seeds at Home?
- Growing your own chia seeds allows you to enjoy fresh, organic produce.
- It can be a cost-effective way to access this superfood.
- Gardening can be a rewarding and therapeutic hobby.
- You ensure the quality and purity of the seeds you consume.
What Are the Ideal Growing Conditions for Chia Seeds?
Chia plants thrive in specific conditions that maximize their growth potential. Here are the key requirements:
- Soil Requirements: Chia seeds prefer sandy or loamy soil rich in organic matter. Good drainage is essential to prevent root rot.
- Light and Temperature Needs: They require full sunlight for at least six hours a day and thrive in warm temperatures, ideally between 70°F and 85°F.
How to Plant Chia Seeds?
Planting chia seeds is a straightforward process. Follow these steps for successful germination:
- Preparing the Soil: Till the soil and mix in organic compost to enrich it with nutrients.
- Planting Techniques: Sow chia seeds directly into the soil, ensuring they are spaced appropriately. Lightly cover them with soil to retain moisture.
How to Care for Your Chia Plants?
Caring for chia plants involves several critical practices:
- Watering Guidelines: Maintain consistent moisture, especially during germination. Avoid overwatering to prevent root issues.
- Fertilization Tips: Apply a balanced organic fertilizer to promote growth, understanding the right timing and quantity is crucial.
When and How to Harvest Chia Seeds?
Knowing when to harvest is vital for quality chia seeds:
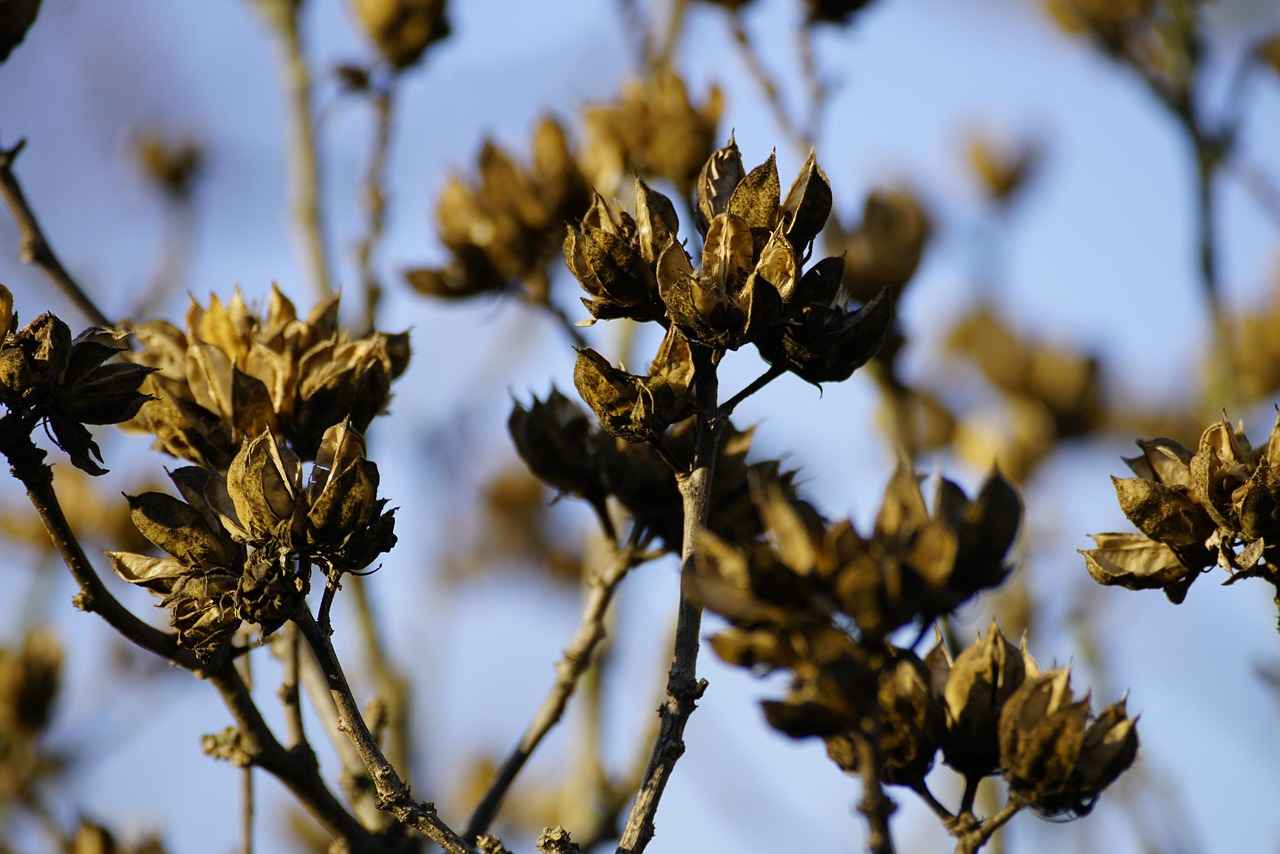
- Signs of Maturity: Harvest when the flowers have dried, and the seed heads turn brown.
- Harvesting Techniques: Cut the seed heads and allow them to dry further before processing.
Common Pests and Diseases Affecting Chia Plants
Like any plant, chia seeds can be affected by pests and diseases:
- Pest Identification and Management: Look out for pests such as aphids and spider mites. Employ organic pest control methods to protect your plants.
- Disease Prevention Strategies: Prevent diseases like root rot through proper watering and soil management.
How to Store Chia Seeds After Harvesting?
Proper storage is crucial for maintaining the nutritional value of harvested chia seeds:
- Storage Conditions: Store seeds in a cool, dry place in an airtight container to prevent spoilage.
- Using Your Homegrown Chia Seeds: Incorporate chia seeds into smoothies, baked goods, or salads for added health benefits.
What Are Chia Seeds?
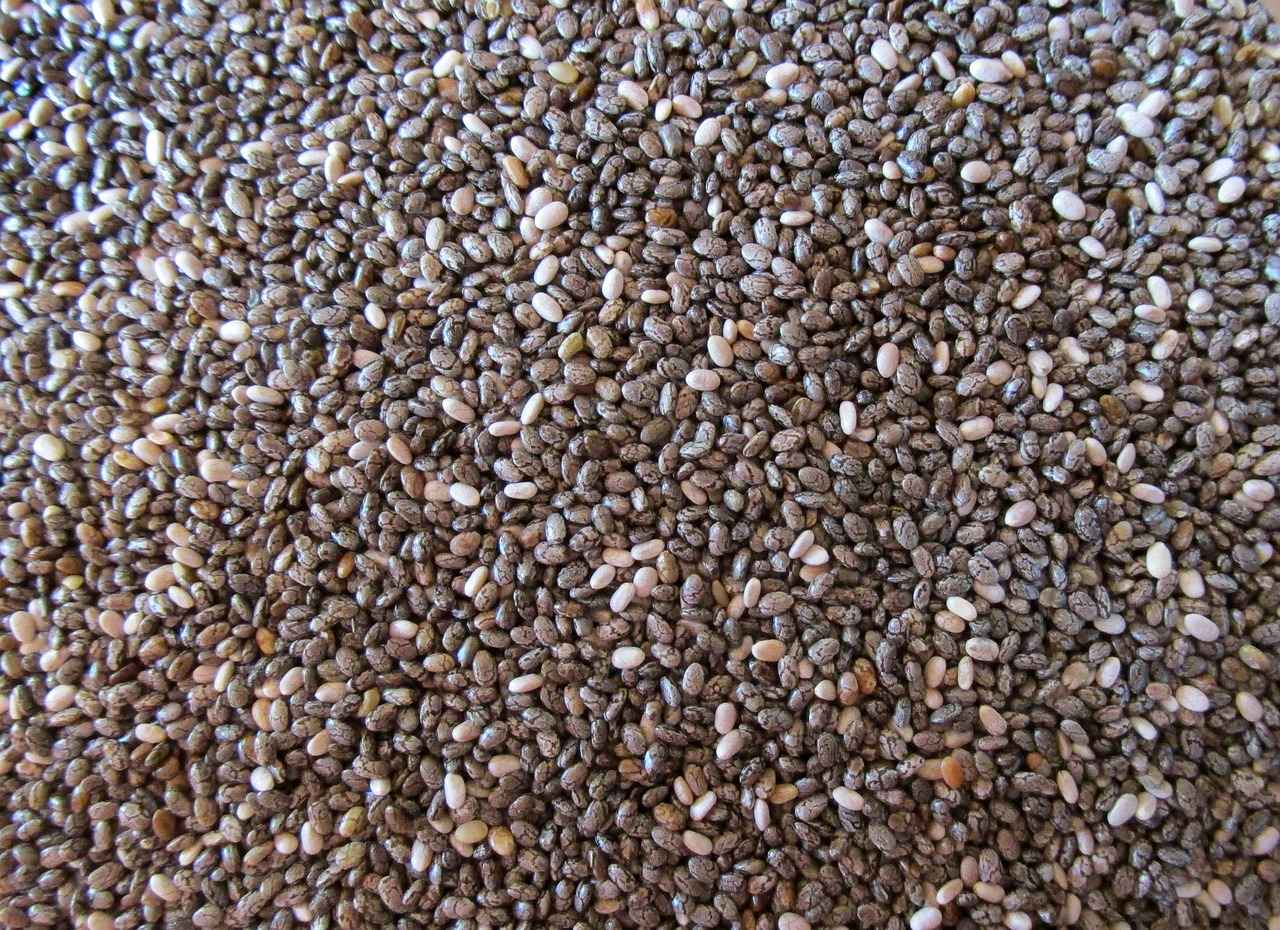
Chia seeds are small, oval-shaped seeds that come from the Salvia hispanica plant, which is native to Mexico and Guatemala. These tiny seeds have gained immense popularity in recent years due to their remarkable nutritional profile and health benefits. Chia seeds are often classified as a superfood because they are packed with essential nutrients that can contribute to overall health and wellness.
One of the standout features of chia seeds is their high content of omega-3 fatty acids, which are essential fats that play a crucial role in heart health and cognitive function. In fact, chia seeds are one of the richest plant-based sources of omega-3s, providing more than salmon per serving. This makes them an excellent choice for those following a vegetarian or vegan diet.
In addition to omega-3s, chia seeds are also a fantastic source of dietary fiber. Just two tablespoons of chia seeds contain around 11 grams of fiber, which is essential for maintaining a healthy digestive system. The high fiber content helps to promote feelings of fullness, making chia seeds a great addition to weight management plans.
Chia seeds are also rich in various essential nutrients, including:
- Protein: They contain all nine essential amino acids, making them a complete protein source.
- Calcium: Important for bone health, chia seeds provide more calcium than dairy products.
- Magnesium: This mineral is crucial for numerous bodily functions, including muscle and nerve function.
- Antioxidants: Chia seeds are rich in antioxidants, which help protect the body from oxidative stress and inflammation.
These nutritional benefits have made chia seeds a popular ingredient in smoothies, salads, and baked goods. They can be easily incorporated into your diet, whether you sprinkle them on top of yogurt, mix them into oatmeal, or use them as a thickening agent in recipes. When soaked in liquid, chia seeds expand and form a gel-like consistency, which can be used to create healthy puddings or as an egg substitute in vegan baking.
Moreover, chia seeds are incredibly easy to grow at home, making them a sustainable source of nutrition. With minimal effort, you can cultivate your own chia plants and enjoy fresh seeds right from your garden. This not only ensures that you have access to high-quality chia seeds but also contributes to a more environmentally friendly lifestyle.
In conclusion, chia seeds are a nutrient-dense superfood that offers numerous health benefits. Their versatility in cooking and baking, combined with their impressive nutritional profile, makes them an excellent addition to any diet. Whether you are looking to boost your omega-3 intake, increase your fiber consumption, or simply explore new ingredients, chia seeds are a fantastic choice that can enhance your overall health.
Why Grow Chia Seeds at Home?
Growing chia seeds at home is an increasingly popular choice among gardening enthusiasts and health-conscious individuals alike. Not only does it provide a source of fresh, organic produce, but it also offers numerous benefits that can enhance your gardening experience and overall well-being.
Enjoy Fresh and Organic Produce: One of the most compelling reasons to grow your own chia seeds is the ability to enjoy fresh, organic produce right from your garden. Store-bought chia seeds may be processed and packaged, losing some of their nutritional value. By cultivating them at home, you ensure that they are harvested at their peak freshness, providing the best taste and nutrient density.
Cost-Effective Gardening: Growing chia seeds can significantly reduce your grocery bills. Organic chia seeds can be expensive when purchased from stores, but by growing your own, you can save money while still enjoying this nutrient-rich superfood. The initial investment in seeds and soil is minimal compared to the ongoing costs of buying organic products.
A Rewarding Gardening Experience: Gardening is known to be a therapeutic activity that can alleviate stress and promote mental well-being. Watching your chia plants grow from tiny seeds into lush, green plants can be incredibly fulfilling. This hands-on experience not only connects you with nature but also teaches valuable skills about plant care and sustainability.
Access to High-Quality Seeds: When you grow chia seeds at home, you have complete control over the growing conditions and can ensure that your plants are free from harmful pesticides and chemicals. This control allows you to produce high-quality seeds that are safe for consumption. Additionally, you can experiment with different varieties and growing techniques to find what works best for your garden.
Environmental Benefits: Cultivating your own chia seeds contributes to a more sustainable lifestyle. Home gardening reduces the carbon footprint associated with transporting produce from farms to stores. By growing your own food, you are actively participating in reducing waste and promoting biodiversity in your local ecosystem.
Versatile Culinary Uses: Homegrown chia seeds can be used in a variety of recipes, from smoothies and salads to baked goods and puddings. This versatility allows you to incorporate these superfoods into your diet easily, maximizing their health benefits. By growing your own, you can experiment with different recipes and discover new ways to enjoy chia seeds.
Educational Opportunities: Growing chia seeds can be an educational experience for families. Children can learn about plant biology, the importance of nutrition, and the process of growing food. This hands-on learning can foster a love for gardening and healthy eating habits in future generations.
In summary, growing chia seeds at home offers a multitude of benefits, from enjoying fresh and organic produce to providing a rewarding gardening experience. It allows you to save money, access high-quality seeds, and contribute positively to the environment. With their numerous health benefits and culinary versatility, chia seeds are an excellent addition to any home garden.
What Are the Ideal Growing Conditions for Chia Seeds?
Growing chia seeds can be a rewarding endeavor, especially when you understand the ideal growing conditions necessary for their success. Chia plants, known for their nutritional benefits, require specific environmental factors to thrive. In this section, we will explore the essential elements such as soil type, light exposure, temperature, humidity, and water requirements that are crucial for cultivating healthy chia plants.
Chia plants flourish in well-draining soil that is rich in organic matter. The ideal soil composition is sandy or loamy, which allows for adequate drainage and prevents root rot. It’s important to avoid heavy clay soils that retain too much moisture. To enhance soil quality, consider adding organic compost or well-rotted manure before planting. This not only improves drainage but also provides vital nutrients to support the growth of chia plants.
Chia plants require full sunlight for at least six hours a day to achieve optimal growth. They thrive in bright, sunny locations, making them suitable for gardens that receive ample sunlight. If you live in a region with intense sun, providing some afternoon shade can help prevent stress on the plants. Adequate sunlight is essential for the production of healthy leaves and seeds, so selecting the right spot is crucial.
The ideal temperature for growing chia seeds lies between 70°F and 85°F (21°C to 29°C). Chia plants are sensitive to cold temperatures and frost, which can hinder their growth. In cooler climates, consider starting seeds indoors or using row covers to protect them during unexpected temperature drops. Monitoring the temperature and providing suitable conditions will ensure your chia plants flourish.
Chia plants prefer moderate humidity levels. While they can tolerate a range of humidity, excessive moisture can lead to fungal issues. Ensuring good air circulation around the plants can help mitigate this risk. If you live in a particularly humid area, consider planting chia in raised beds to improve drainage and airflow. This will create a healthier environment for your plants.
Watering is a critical aspect of chia plant care. These plants need consistent moisture, particularly during germination and early growth stages. However, it is essential to avoid overwatering, which can lead to root rot. A good practice is to check the soil moisture regularly; if the top inch of soil feels dry, it’s time to water. Deep watering encourages strong root development, so aim for a thorough soak rather than frequent shallow watering.
To maximize seed production, understanding the interplay between light, temperature, and water is essential. Maintaining the ideal conditions will not only support plant health but also enhance seed yield. Regularly monitoring your chia plants and adjusting care practices as needed will lead to a bountiful harvest. Additionally, consider planting a variety of chia seeds to diversify your crop and increase resilience against pests and diseases.
By ensuring that your chia plants receive the right combination of soil, sunlight, temperature, humidity, and water, you set the foundation for a successful and fruitful growing experience. With careful attention to these factors, you can enjoy the benefits of homegrown chia seeds.
Soil Requirements
are a critical aspect of successfully growing chia seeds. These tiny but mighty seeds, derived from the Salvia hispanica plant, thrive in specific soil conditions that enhance their growth and nutrient absorption. Understanding these requirements will significantly improve your chances of cultivating a healthy chia garden.
Chia seeds prefer sandy or loamy soil that is rich in organic matter. This type of soil provides the ideal balance of drainage and moisture retention, which is essential for the healthy growth of chia plants. Sandy soil allows excess water to drain away quickly, preventing waterlogged conditions that can lead to root rot. On the other hand, loamy soil combines sand, silt, and clay, offering excellent fertility and structure.
To create the perfect environment for chia seeds, consider the following steps:
- Soil Testing: Before planting, conduct a soil test to check pH levels and nutrient content. Chia plants thrive in slightly acidic to neutral pH levels (around 6.0 to 7.0).
- Organic Matter Addition: Enrich your soil by incorporating organic compost or well-rotted manure. This not only improves soil structure but also provides essential nutrients that support robust plant growth.
- Drainage Improvement: If your soil tends to retain water, consider adding perlite or coarse sand to improve drainage. This will help prevent root diseases that can arise from overly wet conditions.
In addition to soil type, it is crucial to consider the soil’s moisture retention capabilities. While chia plants need consistent moisture, they do not tolerate standing water. Regularly check the soil’s moisture level, especially during the germination phase, to ensure that it remains adequately moist but not soggy.
Another vital factor is the depth of soil. Chia plants develop deep roots, which require at least 12 inches of loose, well-draining soil to grow effectively. If you’re planting in containers, ensure that they are deep enough to accommodate these roots.
Lastly, consider the location of your chia garden. Chia seeds require full sun for at least six hours a day to thrive. Choose a spot that receives ample sunlight, as this will enhance photosynthesis and promote healthy growth.
By paying close attention to these , you can create a thriving environment for your chia plants. Remember, healthy soil leads to healthy plants, and ensuring proper conditions from the start will set the foundation for a successful harvest.
Light and Temperature Needs
When cultivating chia plants, understanding their is crucial for achieving a successful harvest. Chia seeds, known for their numerous health benefits, thrive in environments that mimic their native habitats. Below, we delve into the specifics of what these plants require to flourish.
Chia plants require full sunlight for at least six hours daily. This exposure is vital for their growth, as it helps in the process of photosynthesis, which in turn promotes healthy foliage and robust seed production. If you’re growing chia in a location with limited sunlight, consider using reflective materials to enhance light exposure.
Chia plants thrive in warm temperatures, ideally between 70°F and 85°F. This temperature range allows the plants to grow vigorously and produce high-quality seeds. Temperatures below 50°F can stunt growth, while extreme heat above 95°F can lead to wilting and decreased seed yield.
- Location: Choose a planting site that receives ample sunlight. South-facing areas are often the best.
- Artificial Lighting: If growing indoors or in shaded areas, consider using grow lights to supplement natural sunlight.
- Rotation: Regularly rotate your chia plants to ensure all sides receive equal sunlight exposure.
While chia plants prefer stable temperatures, they can tolerate some fluctuations. However, extreme variations can stress the plants. To mitigate this, consider using mulch to maintain soil temperature and moisture levels.
Insufficient light can lead to stunted growth, weak stems, and poor seed production. Plants may become leggy, stretching towards the light source, which can compromise their overall health. Ensuring adequate sunlight is essential for robust growth and optimal yield.
Monitoring temperature is key to successful chia cultivation. Use a thermometer to check the ambient temperature regularly. If temperatures are too low, consider using row covers or greenhouses to provide warmth. Conversely, if temperatures are too high, ensure adequate watering and consider providing shade during the hottest parts of the day.
By understanding and catering to the of chia plants, you can significantly enhance their growth and seed production. Providing the right conditions not only ensures a healthy crop but also maximizes the nutritional benefits of your homegrown chia seeds. With careful attention to these environmental factors, you can enjoy a thriving chia garden.
How to Plant Chia Seeds?
Planting chia seeds is a straightforward process that can yield a bountiful harvest of this nutritious superfood. This guide will detail the steps necessary to ensure successful germination and growth from seed to plant, making it easier for you to cultivate chia in your home garden.
Before you start planting, it’s crucial to prepare the soil properly. Chia seeds thrive in well-draining soil that is rich in organic matter. Here are the steps to prepare your soil:
- Tilling: Loosen the soil to a depth of about 12 inches. This helps improve aeration and drainage.
- Adding Organic Matter: Incorporate compost or well-rotted manure to enrich the soil with nutrients.
- Testing Soil pH: Chia plants prefer a pH level between 6.0 and 7.5. You can use a simple soil test kit to check this.
Timing is essential for the successful growth of chia seeds. They are generally planted in the spring after the last frost. Ideal temperatures for planting range from 70°F to 85°F. This temperature range encourages optimal germination.
Once your soil is prepared and the timing is right, it’s time to plant your chia seeds. Follow these steps:
- Sowing Seeds: Scatter chia seeds evenly across the prepared soil. Aim for a spacing of about 12 inches between each seed to allow for adequate growth.
- Covering Seeds: Lightly cover the seeds with a thin layer of soil. This helps retain moisture, which is critical for germination.
- Watering: Gently water the area right after planting. Ensure the soil is moist but not waterlogged, as chia seeds are sensitive to excess water.
Chia seeds typically germinate within 7 to 14 days. During this period, maintaining consistent moisture is vital. Here’s how to do it:
- Regular Watering: Water the seeds lightly every few days, ensuring the soil remains damp but not soggy.
- Mulching: Adding a light layer of mulch can help retain soil moisture and suppress weeds that compete for nutrients.
As your chia seeds germinate and grow into seedlings, proper care is essential. Follow these guidelines:
- Sunlight: Ensure your chia plants receive full sun, ideally at least 6 hours of sunlight daily.
- Thinning: Once seedlings reach about 2 inches tall, thin them out to prevent overcrowding. Leave the strongest plants to grow.
- Watering: Continue to water regularly, but gradually reduce the frequency as the plants mature.
Keep an eye on your chia plants as they grow. Look out for signs of pests or diseases and address them promptly. With proper care, your chia plants will flourish and be ready for harvesting in a few months.
By following these steps, you can successfully plant and grow chia seeds at home, ensuring a fresh supply of this nutritious superfood. Happy gardening!
Preparing the Soil
Preparing the soil is a crucial step in the successful cultivation of chia plants. The quality of the soil directly influences the growth, health, and yield of your chia seeds. In this section, we will explore the importance of soil preparation and the best practices to ensure your chia plants thrive.
Before planting chia seeds, it’s essential to prepare the soil properly. This process not only enhances soil structure but also increases its fertility. Chia plants require nutrient-rich soil to grow optimally, and without adequate preparation, you may face challenges such as poor germination rates and stunted growth.
- Tilling the Soil: Start by tilling the soil to a depth of at least 12 inches. This aerates the soil, improves drainage, and breaks up compacted areas, allowing roots to penetrate more easily.
- Adding Organic Compost: Incorporate organic compost into the tilled soil. Compost enriches the soil with essential nutrients, improves moisture retention, and encourages beneficial microbial activity. Aim for a mixture of about 25-30% compost to the existing soil.
- Testing Soil pH: Chia plants thrive in a pH range of 6.0 to 8.0. Conduct a soil test to determine its pH level. If necessary, amend the soil with lime to increase pH or sulfur to decrease it.
- Ensuring Proper Drainage: Chia plants prefer well-draining soil. If your soil is heavy clay, consider amending it with sand or perlite to enhance drainage and prevent root rot.
Chia seeds flourish in sandy or loamy soils that are rich in organic matter. These soil types provide excellent drainage while retaining enough moisture for healthy growth. If your garden soil lacks these qualities, consider creating raised beds filled with a suitable soil mix.
Once you have prepared your soil, it’s vital to maintain its health throughout the growing season. Regularly adding organic matter, such as compost or well-rotted manure, can help sustain nutrient levels. Additionally, practicing crop rotation and cover cropping can prevent nutrient depletion and soil erosion.
In summary, proper soil preparation is the foundation of successful chia cultivation. By investing time and effort into enriching and maintaining your soil, you set the stage for robust chia plants that yield nutritious seeds. Remember, healthy soil leads to healthy plants, so take the necessary steps to ensure your garden flourishes.
Planting Techniques
When it comes to growing your own chia seeds, understanding the is crucial for ensuring successful germination and robust plant growth. Chia seeds are tiny but packed with nutrients, making them a popular choice for home gardens.
To achieve optimal results, follow these best practices when planting chia seeds:
- Direct Sowing: Chia seeds should be sown directly into the soil rather than starting indoors. This method reduces transplant shock and allows the plants to establish themselves in their natural environment.
- Spacing: It is essential to space the seeds appropriately, typically about 12 inches apart. This spacing allows for adequate air circulation and room for growth, preventing overcrowding.
- Soil Coverage: After sowing, lightly cover the seeds with a thin layer of soil. This helps retain moisture during the germination phase, which is critical for seedling development.
- Watering: Water the area gently after planting to ensure the soil is moist but not waterlogged. Consistent moisture is vital, especially during the initial germination period.
Before planting, preparing the soil is a key step:
- Tilling: Loosen the soil to a depth of at least 12 inches. This promotes root development and improves drainage.
- Organic Compost: Incorporate organic compost into the soil to enhance nutrient content. This enriches the soil and provides the necessary elements for healthy chia plants.
- pH Levels: Ensure the soil pH is between 6.0 and 8.0. Conduct a soil test if necessary to determine the pH and adjust accordingly.
The timing of planting is equally important:
- Season: Chia seeds thrive in warm weather, making late spring or early summer the ideal time to sow them in most regions.
- Temperature: Aim for soil temperatures between 70°F and 85°F for optimal germination. Warmer soil promotes quicker sprouting.
- Frost-Free Period: Ensure that the last frost has passed before planting, as chia plants are sensitive to cold temperatures.
Once your chia seeds are planted, monitoring their growth is essential:
- Regular Checks: Check the soil moisture regularly, especially during dry spells. Chia plants prefer consistent moisture but can suffer from root rot if overwatered.
- Weed Management: Keep the area free from weeds that compete for nutrients and water. Hand-pulling or using mulch can help suppress weed growth without harming the chia plants.
- Pest Observation: Be vigilant about potential pests. Inspect the plants regularly for signs of aphids or spider mites, which can hinder growth.
By following these comprehensive planting techniques, you can successfully cultivate chia seeds at home, ensuring a healthy and bountiful harvest. With proper care and attention, your chia plants will thrive, providing you with a nutritious superfood right from your garden.
How to Care for Your Chia Plants?
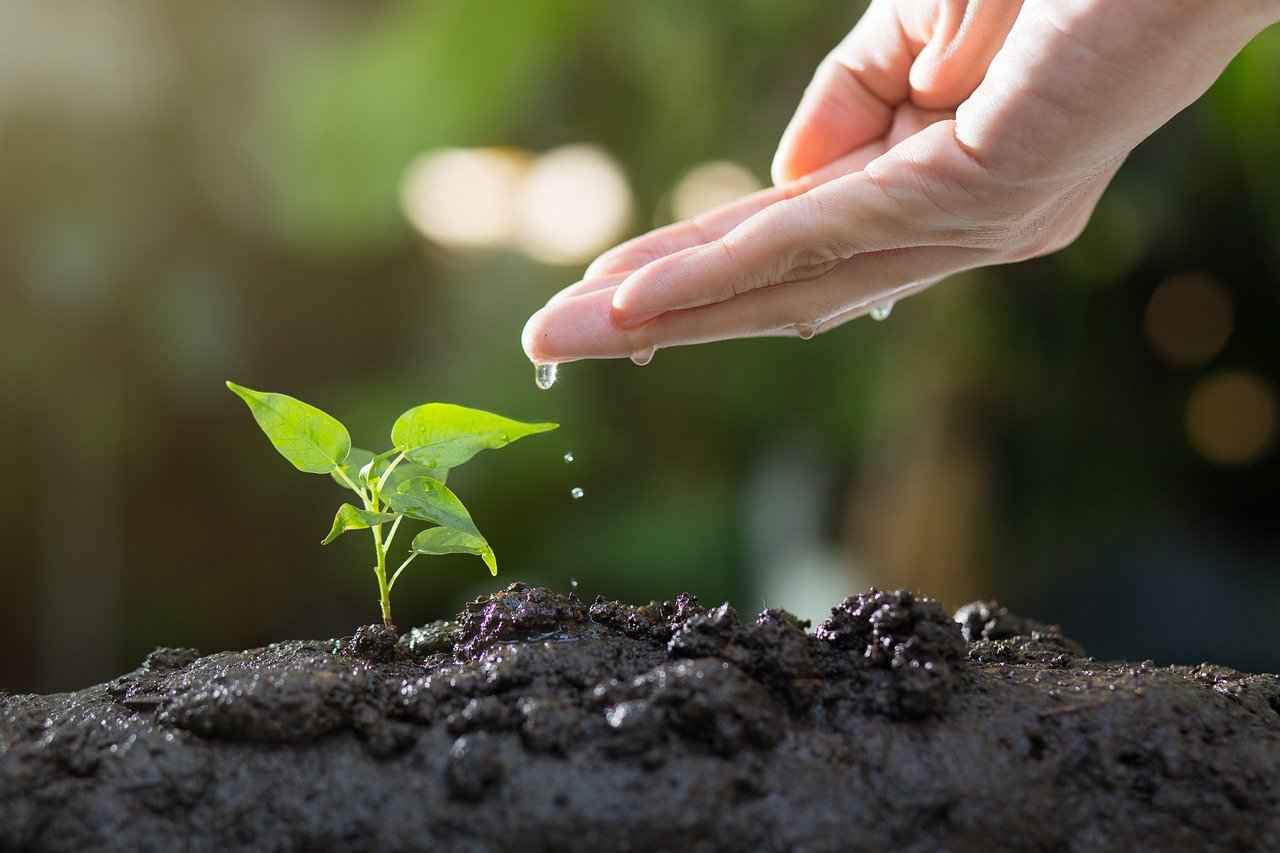
Caring for your chia plants is essential for achieving a healthy and productive garden. These resilient plants require specific attention to watering, fertilization, and pest control to thrive. In this section, we will explore the best practices to ensure your chia plants remain robust and yield a bountiful harvest.
Watering is a crucial aspect of chia plant care. Here are key guidelines to follow:
- Consistent Moisture: Chia plants need consistent moisture during their growth stages, especially while germinating. However, it’s important to avoid overwatering, which can lead to root rot.
- Soil Checks: Regularly check the soil moisture by sticking your finger about an inch into the soil. If it feels dry, it’s time to water.
- Watering Schedule: Water your chia plants early in the morning or late in the evening to reduce evaporation and ensure the plants absorb the moisture effectively.
Fertilization plays a significant role in the growth and health of chia plants. Here are some effective fertilization tips:
- Choosing the Right Fertilizer: Use a balanced organic fertilizer that is rich in nitrogen, phosphorus, and potassium. This will support healthy growth and flowering.
- Timing of Application: Apply fertilizer every 4-6 weeks during the growing season. This helps provide the necessary nutrients at critical growth stages.
- Application Method: Mix the fertilizer into the top layer of soil or apply it as a liquid feed, ensuring even distribution around the root zone.
Protecting your chia plants from pests is vital for maintaining their health. Here are some strategies to consider:
- Regular Inspections: Frequently inspect your plants for signs of pests such as aphids, spider mites, or whiteflies. Early detection is key to effective management.
- Organic Control Methods: Use organic pest control methods, such as neem oil or insecticidal soap, to treat infestations without harming beneficial insects.
- Companion Planting: Consider planting companion plants that naturally repel pests, such as marigolds or basil, to create a healthier growing environment.
Healthy soil is the foundation for thriving chia plants. Here are ways to maintain soil health:
- Adding Organic Matter: Regularly incorporate organic matter such as compost or well-rotted manure into the soil to improve its structure and nutrient content.
- Mulching: Apply a layer of organic mulch around the base of the plants to retain moisture, suppress weeds, and enhance soil quality as it decomposes.
- pH Levels: Test the soil pH to ensure it remains within the ideal range of 6.0 to 7.0. Adjust as necessary with lime or sulfur to optimize nutrient availability.
By following these comprehensive care tips, you can ensure that your chia plants flourish, leading to a successful and rewarding gardening experience. With the right attention to watering, fertilization, and pest management, your chia plants will thrive and provide you with a nutritious harvest.
Watering Guidelines
Watering is a critical aspect of nurturing chia plants, as they require a balance of moisture to thrive. In this section, we will delve into the essential watering guidelines for chia plants, ensuring optimal growth and development.
Chia plants, known for their resilience, still have specific moisture needs. During the germination phase, consistent moisture is vital. This ensures that the seeds can sprout effectively, leading to healthy seedlings. However, it is equally important to avoid overwatering, which can lead to detrimental root issues such as rot.
Chia plants thrive in well-draining soil, which means the amount of water they need can vary based on environmental conditions. Generally, the soil should remain moist but not soggy. A good rule of thumb is to check the soil moisture regularly, especially during the first few weeks after planting. If the top inch of soil feels dry, it’s time to water. This careful monitoring helps maintain an ideal moisture level without risking waterlogging.
- Watering Frequency: During the germination period, water chia plants every 2-3 days. Once established, you can reduce the frequency to once a week, depending on rainfall and humidity levels.
- Watering Method: Use a gentle watering method, such as a watering can or a drip irrigation system, to avoid displacing the seeds or seedlings.
- Time of Day: Watering in the early morning or late afternoon is ideal, as it minimizes evaporation and allows the plants to absorb moisture effectively.
- Signs of Overwatering: Watch for yellowing leaves, wilting, or a foul odor from the soil, which can indicate overwatering. Adjust your watering schedule accordingly.
Environmental factors such as temperature, humidity, and wind can significantly affect how much water your chia plants need. During hot and dry spells, you may need to increase the frequency of watering. Conversely, during cooler, more humid conditions, reduce watering to prevent excess moisture.
Applying a layer of organic mulch around your chia plants can help retain soil moisture. Mulch not only reduces evaporation but also regulates soil temperature, creating a more stable environment for root development. Common mulch materials include straw, grass clippings, and shredded leaves.
To ensure effective watering, consider investing in a soil moisture meter. This tool allows you to measure the moisture content of the soil accurately, helping you make informed decisions about when to water. Regular checks can prevent both under and overwatering, promoting healthy plant growth.
In summary, proper watering is essential for the successful growth of chia plants. By following these guidelines and adjusting your watering practices based on environmental conditions, you can cultivate healthy, thriving chia plants that yield nutritious seeds. Remember to maintain a balance of moisture and to regularly check your soil to ensure your chia plants receive the care they need.
Fertilization Tips
When it comes to cultivating healthy and productive chia plants, fertilization plays a crucial role. Understanding how to apply the right nutrients at the right time can lead to enhanced growth and a more bountiful harvest. In this section, we will delve deeper into effective fertilization strategies for your chia plants.
Chia plants, like all crops, require essential nutrients to thrive. These nutrients support various physiological processes, including photosynthesis, root development, and overall plant health. A well-balanced fertilizer can provide the necessary elements that might be lacking in the soil, ensuring that your chia plants grow robustly and yield a high quantity of seeds.
For chia plants, it is advisable to use a balanced organic fertilizer that contains equal parts of nitrogen (N), phosphorus (P), and potassium (K). Organic options, such as compost or well-rotted manure, not only enrich the soil but also promote beneficial microbial activity. This can lead to better nutrient absorption and improved plant health.
The timing of fertilization is just as important as the type of fertilizer used. Chia plants benefit from an initial application of fertilizer at the time of planting. This provides a nutrient boost to support early growth. A second application can be beneficial during the flowering stage, which is critical for seed production.
Determining the right amount of fertilizer can depend on several factors, including soil quality and plant size. Generally, a rate of 1 to 2 pounds per 100 square feet is recommended for most organic fertilizers. However, it is essential to conduct a soil test to tailor the application to your specific soil conditions.
- Even Distribution: Ensure that the fertilizer is spread evenly across the soil surface to avoid nutrient hotspots that could harm the plants.
- Watering: After applying fertilizer, water the plants thoroughly. This helps to activate the nutrients and promotes better absorption by the roots.
- Avoid Over-Fertilization: Excessive fertilizer can lead to nutrient burn and negatively impact plant health. Always follow recommended guidelines.
After fertilization, it’s crucial to monitor your chia plants for signs of nutrient deficiency or excess. Healthy plants will exhibit vibrant green leaves and robust growth. If you notice yellowing leaves or stunted growth, it may indicate a need for additional nutrients or adjustments to your fertilization schedule.
Fertilizing during periods of drought can be counterproductive. Water stress can limit nutrient uptake, making fertilization less effective. It is best to wait until adequate moisture is present in the soil before applying fertilizer to ensure that your chia plants can utilize the nutrients effectively.
In summary, effective fertilization is a key component of successful chia cultivation. By using a balanced organic fertilizer, applying it at the right times, and monitoring your plants’ health, you can significantly enhance growth and yield. With these tips, you are well on your way to growing your own nutritious chia seeds at home.
When and How to Harvest Chia Seeds?
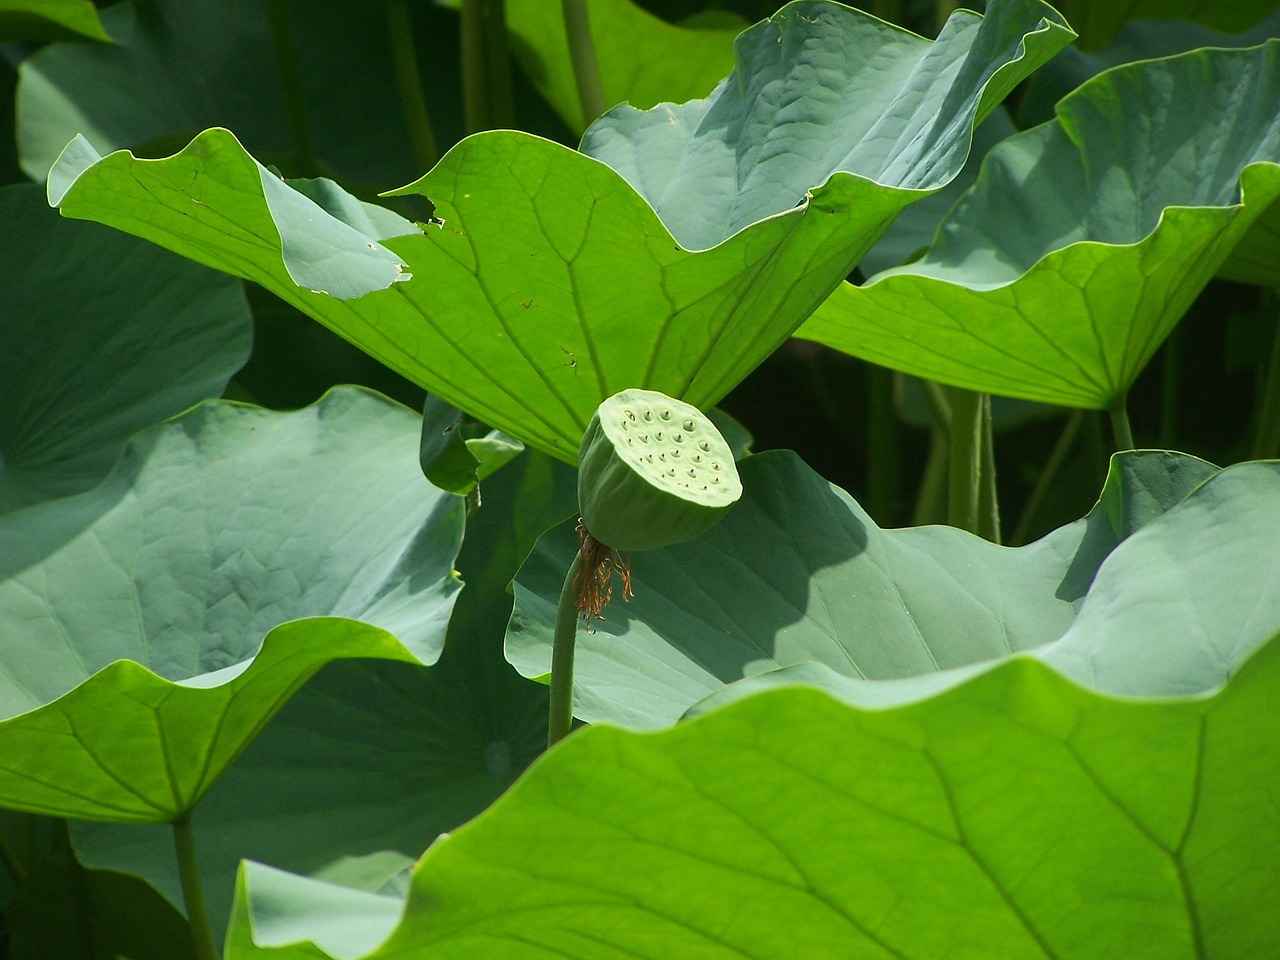
When it comes to harvesting chia seeds, timing and technique are crucial for ensuring the best quality and yield. Understanding the nuances of this process can significantly enhance your gardening success and provide you with nutritious seeds that are ready to be used in various culinary applications.
Recognizing the right moment to harvest chia seeds is essential. Here are some key indicators:
- Color Change: The flowers of the chia plant will transition from vibrant purple to a dull brown color as they mature.
- Dryness: The seed heads should feel dry to the touch, indicating that the seeds inside are fully developed.
- Seed Shaking: Gently shake the seed heads; if you hear rattling, the seeds are likely ready for harvest.
Once you’ve determined that your chia plants are mature, it’s time to harvest. Here are some effective techniques:
- Cutting the Seed Heads: Use sharp garden shears to cut the seed heads from the plant, ensuring you leave a few inches of stem attached.
- Drying the Seed Heads: Hang the cut seed heads upside down in a cool, dry place for about two weeks. This further dries the seeds and makes them easier to collect.
- Collecting the Seeds: Once dried, gently rub the seed heads to release the seeds. Use a bowl or container to catch them as they fall.
After harvesting, it’s important to process your chia seeds properly to maintain their quality:
- Cleaning: Remove any debris or plant material by sifting the seeds through a fine mesh sieve.
- Storage: Store your cleaned chia seeds in an airtight container in a cool, dark place. This helps preserve their nutritional value and prevents spoilage.
If you notice that some of your chia plants are not fully mature at the time of harvesting, consider the following:
- Leave Them Longer: If only a few plants are immature, leave them in the ground for a few more days to allow for further development.
- Check for Pests: Ensure that pests are not preventing maturity. Address any infestations promptly to protect your crop.
By following these guidelines, you can ensure a successful chia seed harvest. Remember, patience and attention to detail are key in this rewarding gardening endeavor.
Signs of Maturity
When it comes to harvesting chia seeds, understanding the is essential for ensuring the best quality seeds. Chia plants, known for their vibrant flowers and nutritious seeds, undergo distinct changes as they approach harvest time. Recognizing these changes not only helps in determining the right moment for harvesting but also maximizes the nutritional value of the seeds you collect.
The first indicator that your chia plants are ready for harvest is the drying of the flowers. Once the flowers have withered and dried, it signifies that the plant has completed its flowering phase. This is a critical stage, as the seeds are developing within the seed heads. At this point, it is important to keep a close eye on the seed heads, which will begin to change color.
As the chia plants mature, the seed heads will turn from green to a brownish hue. This transformation is a clear sign that the seeds inside are ripening. It is crucial to allow the seed heads to remain on the plant until they reach this brown color, as harvesting too early can result in immature seeds that lack the desired nutritional profile.
In addition to color changes, you should also observe the texture of the seed heads. When the seed heads feel dry and brittle to the touch, it indicates that the seeds are ready for collection. At this stage, the seeds have reached their peak quality, ensuring that you are harvesting them at the right time.
Another important factor to consider is the weather conditions leading up to harvest. If you anticipate rain or high humidity, it is advisable to harvest earlier to prevent mold and spoilage. Chia seeds are sensitive to moisture, and wet conditions can compromise their quality.
Once you have confirmed that the flowers are dried, the seed heads are brown, and the texture is dry, it is time to proceed with harvesting. The best method for harvesting chia seeds involves cutting the seed heads from the plant and placing them in a dry, ventilated area. This allows any remaining moisture to evaporate, further enhancing the quality of the seeds.
In summary, paying close attention to the signs of maturity in your chia plants is crucial for a successful harvest. By ensuring the flowers are dried, the seed heads are brown, and the texture is dry, you can collect high-quality chia seeds that are rich in nutrients. This careful observation and timing will lead to a bountiful harvest, allowing you to enjoy the benefits of homegrown chia seeds.
Harvesting Techniques
Harvesting chia seeds is a crucial step in the cultivation process, ensuring that you obtain the highest quality seeds for consumption or future planting. Understanding the right methods and timing can significantly impact the yield and nutritional value of your harvest. This section will delve into effective harvesting techniques and tips to maximize your chia seed collection.
When to Harvest Chia Seeds?
The optimal time for harvesting chia seeds is when the plant’s flowers have dried and the seed heads have turned a deep brown color. This indicates that the seeds are mature and ready for collection. It’s essential to monitor your plants closely during this period, as waiting too long can result in seed loss due to shattering.
Harvesting Methods
- Cutting the Seed Heads: One of the most common techniques involves cutting the seed heads from the plant. Use sharp garden shears to make clean cuts, ensuring you do not damage the plant base. Aim to cut the seed heads when they are fully dry but before they start to break apart.
- Hand Collecting: After cutting the seed heads, hold them over a clean container or tarp and gently shake them to release the seeds. This method is effective but may require patience, as not all seeds will fall out immediately.
- Using a Screen: For larger harvests, consider using a fine mesh screen or sieve. Place the cut seed heads on the screen and gently rub them to separate the seeds from the chaff. This method can speed up the collection process, especially if you have a significant number of plants.
Drying and Processing the Seeds
After collecting the seeds, it’s vital to ensure they are adequately dried to prevent mold and spoilage. Spread the seeds out in a single layer on a clean, dry surface, preferably in a well-ventilated area. Allow them to dry for about 24 to 48 hours, checking regularly for any signs of moisture.
Cleaning the Seeds
Once the seeds are dry, you may notice some residual plant material. To clean them, use a fine mesh sieve to sift through the seeds, removing any debris. Alternatively, you can wash them gently in cold water and then spread them out to dry again. This step ensures that your chia seeds are clean and ready for storage or use.
Storage of Harvested Chia Seeds
Proper storage is essential for maintaining the quality of your harvested chia seeds. Store them in an airtight container in a cool, dark place to protect them from moisture and light. This will help preserve their nutritional value and extend their shelf life, allowing you to enjoy your homegrown superfood for months to come.
Final Thoughts
Harvesting chia seeds can be a rewarding experience, providing you with a nutritious addition to your diet or a source for future planting. By following the techniques outlined above, you can ensure a successful harvest and enjoy the fruits of your labor. Remember to monitor your plants closely, choose the right harvesting methods, and store your seeds properly for the best results.
Common Pests and Diseases Affecting Chia Plants
Growing chia plants can be a rewarding endeavor, but like any other crop, they are not immune to pests and diseases. Understanding the common issues that can arise is crucial for maintaining healthy plants and ensuring a successful harvest. This section will delve into the and provide effective management strategies to mitigate these challenges.
Chia plants can attract various pests that may threaten their growth and yield. Here are some of the most common pests:
- Aphids: These small, sap-sucking insects can weaken plants by feeding on their nutrients. They also excrete a sticky substance called honeydew that can lead to sooty mold.
- Spider Mites: These tiny arachnids thrive in hot, dry conditions and can cause significant damage by puncturing plant cells and sucking out their contents.
- Whiteflies: Similar to aphids, whiteflies feed on the sap of the plants and can transmit viruses, leading to further complications.
Effective pest management is essential for the health of your chia plants. Here are some strategies to keep pests at bay:
- Regular Monitoring: Frequently inspect your plants for signs of pest activity. Early detection is key to preventing larger infestations.
- Natural Predators: Introduce beneficial insects like ladybugs and lacewings, which can help control aphid populations.
- Organic Insecticides: Use neem oil or insecticidal soap as a natural remedy to combat pests without harming beneficial insects.
In addition to pests, chia plants can suffer from various diseases that may hinder their growth. Some prevalent diseases include:
- Root Rot: Caused by overwatering or poorly drained soil, root rot can lead to plant wilting and death.
- Powdery Mildew: This fungal disease appears as white, powdery spots on leaves and can spread quickly in humid conditions.
- Downy Mildew: Similar to powdery mildew, downy mildew thrives in cool, moist environments, causing yellowing and wilting of leaves.
Preventing diseases is often more effective than treating them. Here are several strategies:
- Proper Watering Techniques: Water chia plants at the base to avoid wetting the foliage, which can help prevent fungal diseases.
- Soil Management: Ensure good drainage by using well-draining soil and raised beds to prevent waterlogged conditions.
- Crop Rotation: Rotate your chia crops with other plants to disrupt the life cycles of pathogens.
By understanding the common pests and diseases that can affect chia plants and implementing effective management strategies, you can cultivate healthy plants and enjoy a bountiful harvest. Regular monitoring, good cultural practices, and the use of organic solutions can go a long way in ensuring the vitality of your chia garden.
Pest Identification and Management
is a crucial aspect of ensuring the health and productivity of your chia plants. Early detection of pests can significantly reduce the risk of damage and promote robust growth. In this section, we will explore effective strategies for identifying common pests like aphids and spider mites, as well as organic pest control methods to keep your chia plants thriving.
Identifying pests at an early stage is vital for several reasons:
- Preventing Damage: Early identification allows for timely intervention, preventing pests from multiplying and causing extensive damage to your plants.
- Reducing Chemical Use: By managing pests organically, you minimize the need for chemical pesticides, which can be harmful to the environment and beneficial insects.
- Promoting Plant Health: Healthy plants are less susceptible to pests and diseases, leading to a more bountiful harvest.
Chia plants can be affected by various pests, but two of the most common are:
1. Aphids: Small, soft-bodied insects that suck sap from plants, leading to stunted growth and yellowing leaves.2. Spider Mites: Tiny arachnids that create webs on the underside of leaves, causing leaf discoloration and drop.
Regular inspection of your chia plants is essential for early pest detection. Look for:
- Visual Signs: Check for visible insects on leaves and stems, as well as any webbing or sticky residue.
- Leaf Damage: Yellowing, curling, or wilting leaves can indicate pest infestations.
- Behavior Changes: Observe any changes in plant growth or overall health, which may signal pest problems.
Once pests are identified, several organic methods can help manage them effectively:
- Neem Oil: This natural pesticide disrupts the life cycle of pests without harming beneficial insects.
- Insecticidal Soap: A safe option for controlling soft-bodied insects like aphids by suffocating them.
- Companion Planting: Planting herbs or flowers that attract beneficial insects can help keep pest populations in check.
Regular monitoring of your chia plants is essential for maintaining their health. Implement the following practices:
- Routine Checks: Inspect your plants weekly for any signs of pests or disease.
- Healthy Practices: Keep the planting area clean and free of debris to minimize pest habitats.
- Watering Wisely: Overwatering can stress plants, making them more susceptible to pests.
By being vigilant and proactive in pest management, you can ensure that your chia plants remain healthy and productive. Utilizing organic methods not only protects your plants but also supports a sustainable gardening approach.
Disease Prevention Strategies
Maintaining the health of your chia plants is crucial for a successful harvest. play a vital role in ensuring your plants remain robust and productive. One of the most common issues faced by chia growers is root rot, a condition that can severely impact plant health and yield. This article delves into effective techniques to prevent root rot and other diseases, focusing on proper watering and soil management.
Root rot is primarily caused by overwatering and poor soil drainage, leading to the growth of harmful fungi. These pathogens thrive in overly moist conditions, attacking the roots and preventing the plant from absorbing nutrients and water effectively. If left unchecked, root rot can lead to plant wilting, yellowing leaves, and ultimately plant death.
Proper soil management is essential in preventing root rot. Chia seeds thrive in well-draining soil that allows excess water to escape. Here are some tips to ensure your soil is conducive to healthy plant growth:
- Choose the Right Soil Type: Sandy or loamy soils enriched with organic matter are ideal for chia plants. These soils promote drainage and aeration.
- Use Organic Amendments: Incorporating compost or aged manure can improve soil structure and fertility, enhancing drainage and nutrient availability.
- Avoid Compaction: Regularly aerate your soil to prevent compaction, which can hinder drainage and root growth.
Watering practices are equally important in preventing diseases like root rot. Here are some effective watering strategies:
- Monitor Soil Moisture: Check the moisture level of the soil before watering. A simple finger test—digging into the soil about an inch—can help determine if watering is necessary.
- Water Deeply but Infrequently: When you water, ensure that it penetrates deeply to encourage root development. However, allow the soil to dry out slightly between watering sessions.
- Water Early in the Day: Watering in the morning allows plants to absorb moisture before the heat of the day and reduces evaporation losses.
Crop rotation is another effective strategy to prevent diseases. By alternating the planting of chia with other crops, you can break the life cycle of pathogens that may accumulate in the soil. This practice not only helps reduce disease risk but also improves soil health and fertility.
Keeping a close eye on your chia plants can help you spot early signs of disease. Look for:
- Discoloration: Yellowing leaves or unusual spots may indicate stress or disease.
- Wilting: If plants appear droopy despite adequate watering, it may be a sign of root issues.
- Pest Infestations: Pests can weaken plants and make them more susceptible to diseases.
When selecting chia seeds, consider using disease-resistant varieties. These seeds have been bred to withstand common diseases, providing an extra layer of protection for your plants.
By implementing these , you can significantly reduce the risk of root rot and other ailments affecting your chia plants. A proactive approach to soil management and watering, combined with careful monitoring and crop rotation, will lead to healthier plants and a bountiful harvest.
How to Store Chia Seeds After Harvesting?
Storing chia seeds properly after harvesting is essential to maintain their nutritional integrity and ensure they remain viable for future planting or consumption. Chia seeds are packed with omega-3 fatty acids, antioxidants, and fiber, making them a popular superfood. However, improper storage can lead to spoilage and a reduction in their health benefits. This section will provide you with the best practices for storing chia seeds effectively.
To keep chia seeds fresh and nutrient-rich, it is vital to store them in the right conditions. Here are some key factors to consider:
- Temperature: Store chia seeds in a cool environment, ideally below 70°F (21°C). High temperatures can degrade their quality over time.
- Humidity: Keep seeds in a dry place to prevent moisture absorption, which can lead to mold growth.
- Light Exposure: Protect chia seeds from direct sunlight. Use opaque containers to shield them from light, which can cause oxidation.
The choice of container plays a significant role in the longevity of chia seeds. Here are some recommended options:
- Airtight Glass Jars: These are ideal for long-term storage as they prevent air and moisture from entering.
- Plastic Containers: Ensure they are BPA-free and have a tight seal. While less durable than glass, they are lightweight and convenient.
- Vacuum-Sealed Bags: For extended storage, vacuum sealing can eliminate air and extend shelf life significantly.
When stored correctly, chia seeds can last for up to five years without significant loss of quality. However, it is advisable to check for signs of spoilage, such as an off smell or changes in texture, before use. Regularly rotating your stock can help ensure that older seeds are used first, maintaining freshness.
Yes, freezing chia seeds is an option for those looking to extend their shelf life even further. Here are some tips:
- Use Airtight Containers: Ensure they are properly sealed to prevent freezer burn.
- Label and Date: Keep track of when you freeze them to manage your inventory better.
When ready to use, thaw the seeds at room temperature before incorporating them into your recipes.
It’s important to perform a quick check before using stored chia seeds. Here are some indicators of spoilage:
- Odor: Fresh chia seeds have a mild, nutty smell. If they smell rancid or off, it’s time to discard them.
- Texture: If the seeds feel sticky or clump together, they may have absorbed moisture and should not be consumed.
- Appearance: Look for any discoloration or mold, which is a clear sign of spoilage.
By following these storage guidelines, you can ensure that your harvested chia seeds remain fresh and nutritious for an extended period. Proper storage not only preserves their health benefits but also guarantees that you can enjoy your homegrown superfood whenever you need it.
Storage Conditions
Proper storage of your chia seeds is essential to preserve their freshness and nutritional benefits. By following the right storage practices, you can ensure that your seeds remain viable for an extended period, allowing you to enjoy their health benefits whenever you need them.
Chia seeds are sensitive to moisture and light, which can significantly impact their shelf life. When exposed to these elements, chia seeds can spoil, losing their nutritional value and developing an unpleasant taste. Therefore, understanding the best storage conditions is crucial for maintaining their quality.
- Cool and Dry Environment: Store chia seeds in a cool, dry place, such as a pantry or cupboard. Avoid areas that experience temperature fluctuations, such as near ovens or stoves.
- Airtight Containers: Use airtight containers to store chia seeds. Glass jars, vacuum-sealed bags, or tightly sealed plastic containers work well. This prevents air and moisture from entering, which can lead to spoilage.
- Dark Storage: Light exposure can degrade the quality of chia seeds. Store them in a dark place or use opaque containers to shield them from light.
- Refrigeration for Long-Term Storage: If you plan to store chia seeds for an extended period, consider refrigerating them. This can help prolong their shelf life and maintain their freshness.
When stored properly, chia seeds can last for up to two years. However, it’s always a good practice to check for any signs of spoilage, such as off smells or changes in texture. If you notice any of these signs, it’s best to discard the seeds.
Yes, freezing chia seeds is another effective method for long-term storage. Place them in an airtight container or vacuum-sealed bag before putting them in the freezer. When you’re ready to use them, simply take out the desired amount and let them thaw at room temperature.
Before using chia seeds, always perform a quick check:
- Smell: Fresh chia seeds have a neutral smell. If they emit a rancid or off-putting odor, they have likely spoiled.
- Appearance: Check for any discoloration or signs of mold. Fresh seeds should be dark brown or black, depending on the variety.
- Texture: If the seeds feel sticky or clump together, it’s a sign they have absorbed moisture and may no longer be safe to consume.
Once you have successfully stored your chia seeds, you can incorporate them into your diet in various ways:
- Smoothies: Add a tablespoon of chia seeds to your smoothies for an extra boost of nutrition.
- Baked Goods: Use chia seeds in muffins, bread, or pancakes for added texture and health benefits.
- Puddings: Mix chia seeds with your favorite plant-based milk and let them sit overnight to create a delicious pudding.
By following these storage guidelines, you can ensure that your chia seeds remain fresh and ready to enhance your meals with their numerous health benefits.
Using Your Homegrown Chia Seeds
Homegrown chia seeds are not just a source of nutrition; they are incredibly versatile and can be incorporated into a variety of dishes. This section will explore creative ways to use your chia seeds, ensuring you reap the maximum health benefits they offer.
Chia seeds are packed with essential nutrients, including omega-3 fatty acids, fiber, protein, and antioxidants. Incorporating them into your diet can:
- Improve digestion due to their high fiber content.
- Support heart health by providing omega-3s.
- Boost energy levels and help with weight management.
- Enhance skin health due to their antioxidant properties.
One of the easiest ways to incorporate chia seeds into your diet is by adding them to smoothies. Here’s a simple recipe:
Ingredients:- 1 banana- 1 cup of spinach- 1 tablespoon of chia seeds- 1 cup of almond milkInstructions:1. Blend all ingredients until smooth.2. Enjoy your nutrient-packed smoothie!
Absolutely! Chia seeds can be a great addition to baked goods. They can act as a replacement for eggs in vegan recipes. To create a chia egg, mix:
1 tablespoon of chia seeds2.5 tablespoons of waterLet it sit for 5-10 minutes until it thickens.
This mixture can be used in muffins, pancakes, or brownies to add moisture and nutrition.
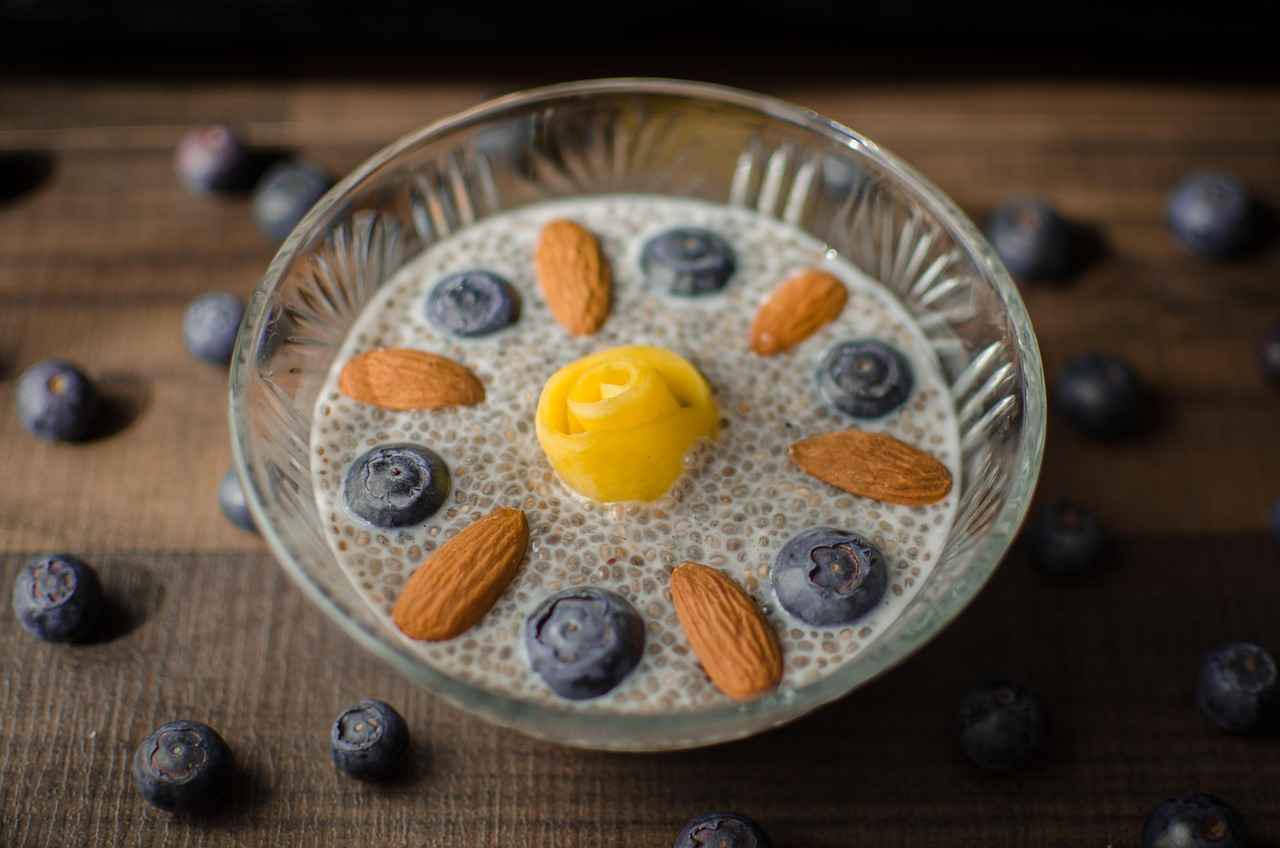
Chia seed pudding is a delicious and easy way to enjoy your seeds. Combine:
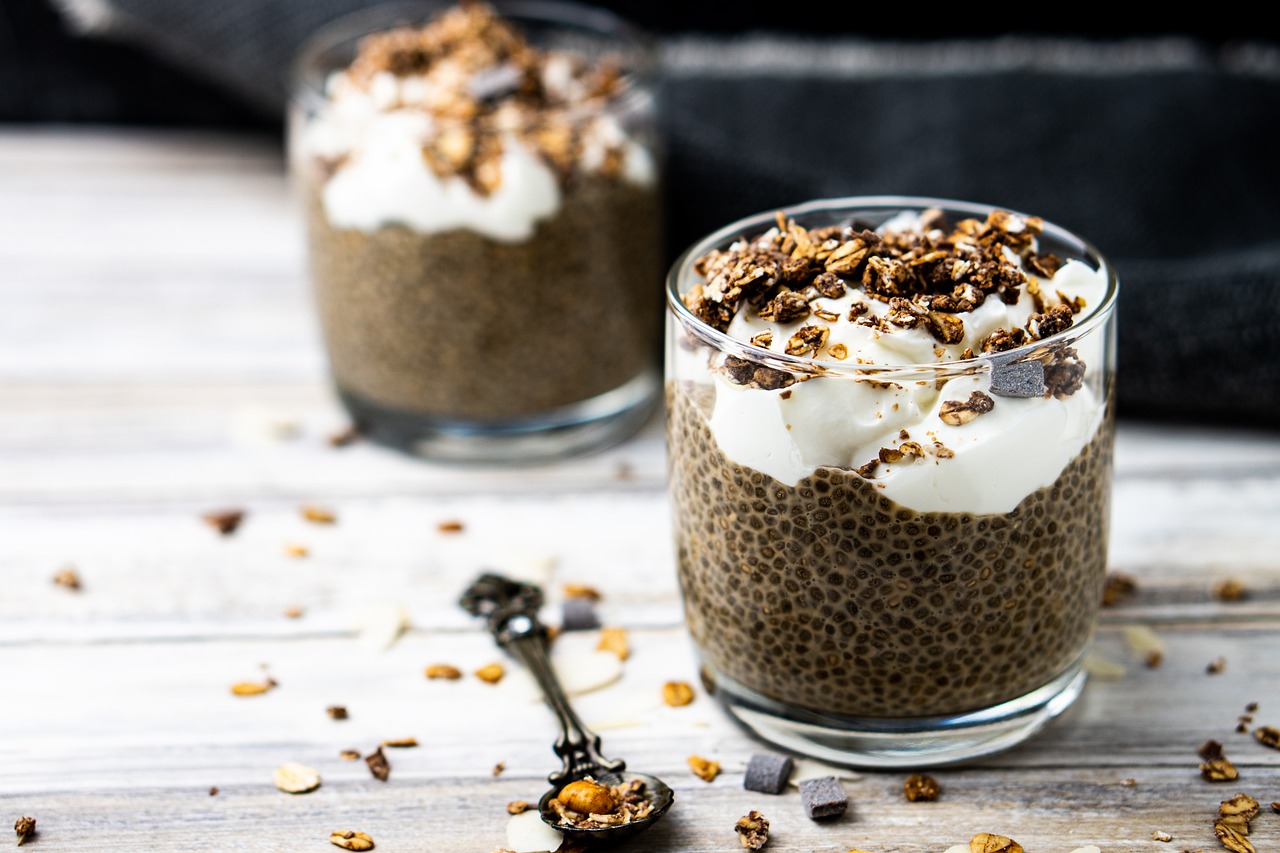
1/4 cup of chia seeds1 cup of almond milk1 tablespoon of honey or maple syrupMix well and let it sit in the refrigerator overnight. The next day, you can top it with fruits, nuts, or granola!
Sprinkling chia seeds on salads can add a delightful crunch. They can also be soaked in water or dressing to create a gel-like consistency that enhances the flavor and texture of your salads.
Certainly! Here are a few more ideas:
- Add chia seeds to your yogurt for added texture and nutrients.
- Incorporate them into oatmeal or overnight oats for a nutritious breakfast.
- Mix chia seeds into your homemade energy bars for a healthy snack.
In conclusion, the versatility of homegrown chia seeds allows you to integrate them into your meals seamlessly. Whether in smoothies, baked goods, or salads, these tiny seeds pack a powerful nutritional punch that can enhance your overall health.
Frequently Asked Questions
- Can I grow chia seeds indoors?
Absolutely! Chia seeds can be grown indoors as long as they receive enough sunlight. A sunny windowsill or a grow light can do the trick. Just make sure to keep the soil moist and provide good drainage!
- How long does it take for chia seeds to germinate?
Germination usually takes about 7 to 14 days, depending on the temperature and moisture levels. Keep an eye on your seeds, and you’ll see those little sprouts popping up in no time!
- Do chia plants require a lot of water?
While chia plants need consistent moisture, they don’t like to sit in water. Water them regularly but ensure the soil drains well to prevent root rot. Think of it like giving them a drink without drowning them!
- What pests should I watch out for when growing chia?
Common pests include aphids and spider mites. Regularly inspecting your plants and using organic pest control methods can help keep these pesky critters at bay.
- How can I tell when my chia seeds are ready to harvest?
You’ll know it’s time to harvest when the flowers dry up and the seed heads turn brown. It’s like waiting for the perfect moment to pick a ripe fruit!
